Realistic Dummy Camera Setup: Blinking Light Guide for Beginners
Beginners installing a realistic dummy camera for enhanced security should focus on strategic placem…….
Beginners installing a realistic dummy camera for enhanced security should focus on strategic placement in high-visibility, accessible areas. This includes eye-level or slightly elevated positioning, avoiding obstructions, and regular cleaning. Follow detailed instructions for unboxing, assembly, and mounting, ensuring proper cable connections and settings configuration. Maintain the camera with regular inspections, keep it clean, and test motion detection and alarms frequently for optimal deterrence.
Uncover the secrets of creating an immersive security setup with our guide on dummy camera red blinking light installation. From understanding the basics, like why these cameras are crucial for deterrence, to choosing the perfect location to maximize their effectiveness, this article is your go-to resource. Learn a step-by-step hardware setup process and discover testing and maintenance tips to ensure your dummy camera installation offers realistic, functional security. Master these techniques for an authentic deterrent.
- Understanding Dummy Camera Red Blinking Light: A Beginner's Guide
- Choosing the Right Location for Your Installation: Tips and Tricks
- Setting Up the Hardware: A Step-by-Step Process
- Testing and Maintenance: Ensuring a Realistic and Functional Setup
Understanding Dummy Camera Red Blinking Light: A Beginner's Guide
The dummy camera red blinking light installation is a popular choice for those looking to enhance their home or business security while adding a touch of realism. This guide aims to demystify the process for beginners, offering practical tips for a successful and effective setup.
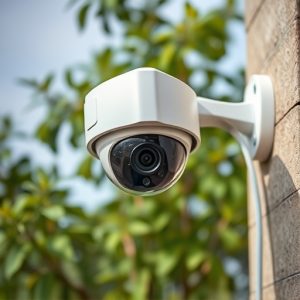
When installing a realistic dummy camera, the first step is to choose a location strategic enough to deter potential intruders. These cameras are designed to mimic the appearance of actual surveillance equipment, so placing them in plain sight can send a powerful message. Ensure the area provides good visibility and is within reach for easy monitoring. Next, carefully unpackage your dummy camera, studying its components and following manufacturer instructions for assembly. Pay attention to details like positioning the red blinking light for optimal effect. Mounting options vary; some come with adhesive or screws, so select the method suitable for your chosen location.
Choosing the Right Location for Your Installation: Tips and Tricks
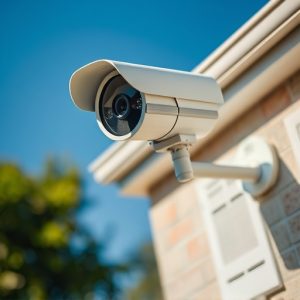
When planning a realistic dummy camera installation, choosing the right location is paramount. Think about areas with high foot traffic or where security is a priority. Entryways, corridors, and outdoor paths are excellent choices as they provide clear lines of sight. Positioning your dummy camera near windows can also serve as a deterrent to potential intruders.
Consider the surrounding environment and lighting conditions. Well-lit areas are ideal for enhancing visibility. Mounting the camera at eye level or slightly elevated ensures it captures clear, unobstructed images. Avoid placing it in areas prone to obstructions like plants, signs, or furniture that could interfere with its field of view. Regularly maintaining and cleaning the camera will also ensure optimal performance and appearance.
Setting Up the Hardware: A Step-by-Step Process
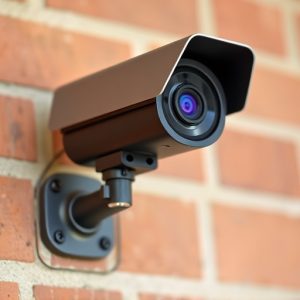
Setting up a realistic dummy camera installation involves careful planning and execution. Start by selecting a suitable location, ensuring it offers ample visibility and is easily accessible for monitoring. Mount the dummy camera on a sturdy tripod or wall bracket, adjusting its height and angle for optimal view. Next, connect the camera to a power source and use the provided cable to link it to your monitor or recording device.
Follow the manufacturer’s instructions to configure the settings, including date, time, and video quality. Attach the red blinking light to complement the camera’s appearance, simulating a genuine security setup. Ensure all connections are secure, test the system, and adjust as needed for a seamless and effective dummy camera installation.
Testing and Maintenance: Ensuring a Realistic and Functional Setup
When setting up a dummy camera with a red blinking light, testing and maintenance are crucial for a realistic and functional setup. Begin by verifying that the light blinks at an appropriate interval, matching real-world surveillance camera behavior. Adjust the timing if necessary to create a convincing simulation. Regularly inspect the camera’s components—lenses, cables, and connectors—for any signs of damage or fraying, ensuring a secure connection. Keep the surrounding area clean, free from obstructions, and well-lit to enhance the installation’s authenticity.
For optimal results, consider using high-quality dummy cameras designed for security purposes. Periodically testing the system’s functionality, including motion detection and alarm triggers, ensures it operates as intended. Additionally, regularly updating firmware and software can improve performance and add new features, making your dummy camera setup more realistic and effective in deterring potential intruders.
Creating a realistic dummy camera installation is both an art and a science. By understanding the components, selecting the ideal location, setting up the hardware correctly, and implementing proper testing and maintenance, you can achieve a functional and convincing security setup. These comprehensive tips ensure your dummy camera red blinking light installation not only looks the part but also stands the test of time, enhancing your home or business’s security while maintaining an authentic aesthetic.