Realistic Dummy Camera: Installation Tips for Enhanced Security
Before installing security camera shells with lights, assess your monitoring needs, choose weatherpr…….
Before installing security camera shells with lights, assess your monitoring needs, choose weatherproof outdoor cameras or indoor models with adjustable angles and high-resolution sensors, strategically mount them in visible areas like walls or ceilings at eye level for maximum deterrent effect, enhance night vision with lighting features, blend camera shells into surroundings using matching finishes, and regularly test lighting and camera angles.
“Enhance your home or business security with a creative solution: the illuminated security camera shell. This guide covers all aspects of integrating this realistic dummy camera system, from understanding your security needs to installation and maximizing its effectiveness. Learn how to choose the perfect shell and camera combination for your space, following a detailed step-by-step process. Discover expert tips to ensure optimal performance and an aesthetically pleasing result with your Realistic Dummy Camera Installation Tips.”
- Understanding Your Security Needs: Before You Begin
- Choosing the Right Realistic Dummy Camera for Your Shell
- Installation Process: A Step-by-Step Guide
- Additional Tips for Maximizing Effectiveness and Aesthetics
Understanding Your Security Needs: Before You Begin
Before diving into the world of security camera shells with lights, understanding your specific security needs is crucial. Begin by assessing the areas you want to monitor—whether it’s a home or business—and identify potential blind spots or high-risk zones. Consider factors like lighting conditions, the layout of the space, and any unique challenges that might affect camera placement.
Realistic dummy camera installation tips include strategically placing cameras in visible locations to deter potential intruders while leveraging good lighting to enhance image quality. Don’t forget to consider power sources and wiring, ensuring your setup is discreet yet reliable. By aligning your security measures with these practical steps, you’ll create a robust and effective surveillance system tailored to your needs.
Choosing the Right Realistic Dummy Camera for Your Shell
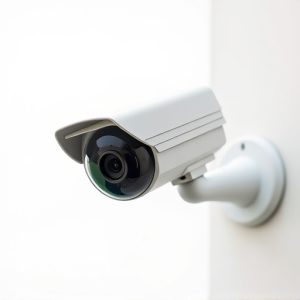
When selecting a Realistic Dummy Camera for your security camera shell, consider its purpose and placement. For outdoor use, opt for models designed to withstand varying weather conditions, featuring durable housing and infrared lighting for night vision. Indoor cameras should blend seamlessly with surroundings; look for those with adjustable angles and high-resolution sensors for clear images.
For optimal results, match the camera’s field of view to your shell’s coverage area. Read installation tips and guidelines from manufacturers to ensure proper alignment and positioning. Mounting height is crucial; place it at eye level or slightly higher to capture unobstructed views. Regularly test battery life and consider models with wireless connectivity for easy monitoring and updates.
Installation Process: A Step-by-Step Guide
Installation Process: A Simplified Guide
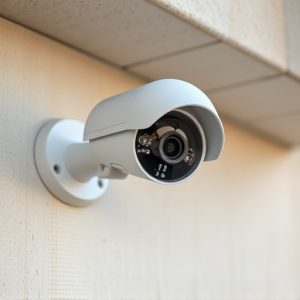
The first step in transforming your space with a realistic dummy security camera is choosing the perfect location. Mounting it in plain sight, like on walls or ceilings, can act as a powerful deterrent for potential intruders. Ensure accessibility for easy setup and optimal visibility of entry points. With the right placement, you’ll create an illusion of enhanced security.
Next, gather your tools: a drill with various bits, screws, and the camera shell itself. Start by creating pilot holes to guide the screw placement. Attach the bracket or base securely, following manufacturer instructions. Once fastened, mount the dummy camera onto the bracket, positioning it at eye-level or slightly elevated for maximum effectiveness. Add lighting features if desired, aiming them strategically for enhanced realism and improved night vision capabilities.
Additional Tips for Maximizing Effectiveness and Aesthetics
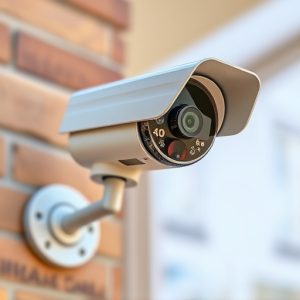
To maximize the effectiveness and aesthetic appeal of your security camera shell with lights, consider these realistic dummy camera installation tips. First, strategically place the cameras in well-lit areas, ensuring clear visibility for optimal video quality. Use reflective surfaces around the camera lenses to bounce light back, enhancing illumination and creating a more immersive surveillance environment.
Next, blend the camera shells seamlessly into your surroundings. Mount them at eye level or slightly above to mimic real human observation points. Paint the shells to match nearby structures or use realistic dummy cameras with various finishes to avoid an obvious security presence. Regularly test the lighting and camera angles to ensure they remain effective over time, adapting to any changes in your environment.
Securing your home or business with a security camera shell equipped with lights is now more accessible than ever. By understanding your security needs, selecting the right realistic dummy camera, and following our step-by-step installation guide, you can create an effective deterrent system. Remember to consider additional tips for maximizing both the effectiveness and aesthetics of your setup. With these Realistic Dummy Camera Installation Tips, you’ll be well on your way to enhancing your property’s security in style.